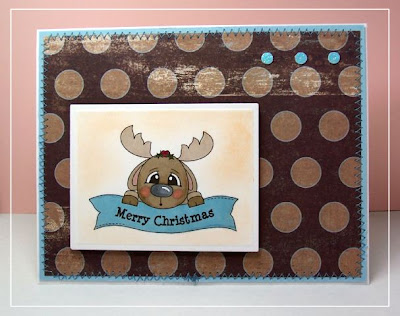
Hello and happy Thursday! Today is a special posting for
Designed2Delight. All the DT gals have created SUPER embellishment tutorials for you all. First, I want to show off my finished card using the
D2D FREEBIE!!
I used Me & My Big Idea DP, the
D2D freebie colored with Prisma Premier Markers, nesties and Worn Lipstick Ranger Ink for shading, sewing, sentiment is Stampin' Up, and the Felt Flower embellishment made by....ME! Next is my tutorial, then a sneek peek of all the other tutorials put together by the talented D2D team - with links to their blogs!
Make a felt or fabric flower embellishment:

There are many ways to make felt/fabric flower embellishments. This is just one way using the Cuttlebug and Nestabilities. I'm using the Dahlia, but the circles, scalloped circles, inverted scalloped, etc. all work well. The recipe: Plate A, Plate B, pieces of felt/fabric, nesties face DOWN, Plate C. I sometimes put a regular piece of CS (NOT 110lb PTI - something along the lines of 60lb) on top of the nesties before Plate C for a clean cut. I run the plates through once and then back again.
Doing it twice and with CS on top gives a nice clean cut.
I gather my supplies: felt/fabric pieces, thread and needle, and one button. Stack the felt/fabric and button and sew through all layers (just like sewing a button on a shirt).
Super simple handmade embellishment in under 5 minutes! Don't have a Cuttlebug or Nestabilities? No problem. Use pinking shears (those zig-zag scissors) and cut your own circles in two or three different sizes.
My personal preference for adhearing embellishments to my cards is Glue Dots. I picked these up at Michael's long ago and never have things fall apart.
Here is my final project.
**Make-Your-Own Embellishments Blog Extravaganza**
The Designed2Delight Lead Designers have been busy!! Follow all the links below to view 9 different tutorials for 9 different embellishments (on 8 different blogs) that YOU can make YOURSELF!!


+500x494.JPG)


